Share your music,enjoy your Zune(free download video,convert video,wifi...)
- Inicie sesión o regístrese para enviar comentarios
18 Octubre, 2007 - 06:44

This guide will show you a detailed way on how to convert DVD to Zune and how to use limewire to download free music video to your computer, and then transfer limewire free music video to Zune. From this useful guide, you will also learn how to extract the audio of the music video and use Zune’s WiFi to share the audio between Zuners!
Part One: Convert DVD to Zune video
Part Two: Use limewire to download free music video
Part Three: Convert Music Video to Zune video
Part Four: Extract the audio of Music Video to Zune music
Tips:
1.Trim the video to select the part of the music video which you need
2. Adjust volume
Part Five: Transfer the video or audio to Zune
Part Six: Use Zune’s WiFi to share the music[b]
[b]Part One: Convert DVD to Zune video
1 Download Daniusoft DVD to Zune Converter(Supports Window Vista), Install and Run it.
2 You can click on “Load File” to add DVD/IFO from your hard disk. Or insert your DVD disc into your DVD-Rom (Ensure that you have sufficient space on hard drive to store the DVD). Click “Load DVD” button to add the DVD file.
3 This software can convert DVD to all Zune video. Click the “Format” drop down list to select a format.

4.If you want to convert DVD by default settings, just click “Start” button to convert. It is the easiest and common way to convert with only three steps.
Part Two: Use limewire to download free music video
1. Download Limewire: http://www.limewire.com/download, it is totally free.
2. Run the Limewire, Just type in some words that you may be interested in, choose the type, and press search, then you can get a lot of files to download.

Find the file you want and click download to get it. You can download multiple files in one time.
After you download the file, then right-click on the download file and choose “explore”, then you can find your file.
You can also Option, then you can set the default downloaded directory. Click tool folder for saving your file.
Part Three: Convert Music Video to Zune video
If you want put the video on your Zune, make sure the video formats are as follows: WMV, MP4, because the Zune only support these video formats. If the video which you download by limewire do not meet the requirement, you can use Daniusoft Zune Video Converter to convert it.
1. Download Daniusoft Zune Video Converter (Supports Window Vista), Install and Run it.
2. Click the “Add” button to load video files. This powerful Zune Video Converter software support convert AVI, MP4, MPEG, WMV, DAT, MOV, ASF and FLV, etc video to Zune video format.
3. Click the “Format Preset” drop down list to select a format.
4. If you want to convert video by default settings, just click “Start” button to convert. It is the easiest and common way to convert with only three steps.

Note: You can click the “Settings” button next to the format field to open the Settings window and set video resolution, frame rate, bit rate, encoder, etc
Note: You can click the “Settings” button next to the format field to open the Settings window and set video resolution, frame rate, bit rate, encoder, etc
Part Four: Extract the audio of Music Video to Zune music
If you only want to extract the audio of the music audio, Daniusoft Zune Video Converter also can help you.
1. Download Daniusoft Zune Video Converter (Supports Window Vista), Install and Run it.
2. Click the “Add” button to load video files.
3. Click the “Format Preset” drop down list to select a format. This powerful software can help you to extract audio of the video and save as mp3, wma or m4a format.
4. If you want to extract audio of the video by default settings, just click “Start” button to convert. It is the easiest and common way to convert with only three steps.
Tip:
1. Trim – If you only want to convert the part of the video, here you can trim any segment of your clips to convert video by click the “Trim” button.

2. If you want to adjust the volume, just click on “Effect” button. You could adjust the volume by drag the button.
Part Five: Transfer the video or audio to Zune
After finish conversion, add your converted files to Zune software and click “Sync contents to and from your Zune”, then you can enjoy your video or music on Zune. You can download the Zune software free from here: http://www.zune.net/en-us/meetzune/software.html

Part Six: Use Zune’s WiFi to share the music
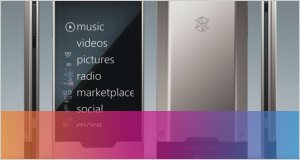
Engaging the WiFi allows you see what other Zune users within the approximately 30-foot range are listening to, and you can transfer one of your songs or pictures to any other Zune.
The following pictures and words will tell you how to share the music with the WiFi step by step.
1. Find the music which you want to share with your friend, and click it.
![]()
![]()
2. You will see the option “send”, click it. Zune will search the other Zune beside you. After searching finished, you will get a list of the number of Zune users beside you, and then choose your target user, the transfers begin.
![]()
![]()
3. After about 15 seconds, the song transfers could be finished, and your friends can share your music on their own Zune!
![]()
![]()